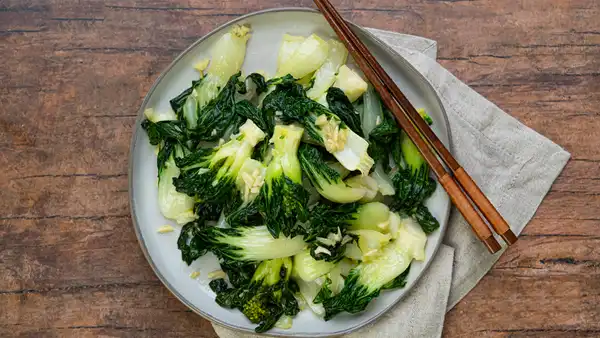
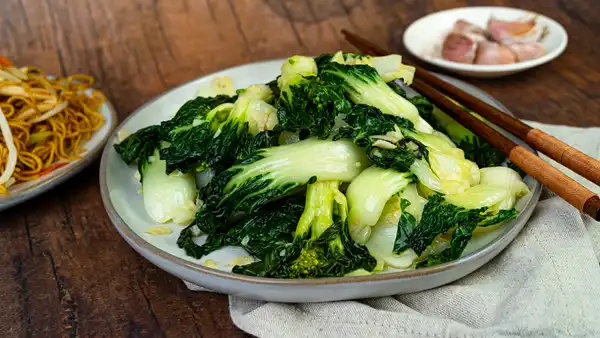
Stir Fried Bok Choy (蒜蓉炒白菜)

A delicious vegetable side dish that's easy, quick, and healthy!

flodesk gif
Prep Time
5 min
Total Time
20 min
Yields
4 servings

A Recipe by Daddy Lau

My dad's been cooking Chinese food for over 50 years - as a kid fending for himself in Guangzhou, as the head chef of his own restaurant, and as a loving father in our home.

Hopefully, by learning this recipe, you'll get to experience some of the delicious joy we felt growing up eating his food!

- Randy

This is a super simple recipe that my parents make multiple times a week.

I basically grew up on stir-fried bok choy, as well as bok choy soup, which we also have a recipe for!

These two recipes are perfect complements to each other, since the older, outer leaves are perfect for the soup and the tender, inner layers are more suited for the stir-fry.

"White Vegetable"

Just like the words “cafe” and “chocolate”, bok choy is a loan word from Cantonese “baahk choi”, which literally means “white vegetable.”

Bok choy is one of the many different types of Chinese cabbage, cultivated for over 2000 years for its resistance to cold weather.

Check out a quick story summary of our recipe!
Ingredients

Weight: US
oz
g
Volume: US
cup
mL
Servings
4

Stir Fried Bok Choy

  • 1 lb baby bok choy (

    larger bok choy works too

    )
  • 2 clove garlic
  • 2 tbsp corn oil
  • 0.50 tsp salt
  • 0.50 tsp sugar
  • 0.50 tsp chicken bouillon (

    optional

    )

On Bok Choy

My parents generally prefer baby bok choy, but this also works with the larger variety and Shanghai bok choy.

Finding Asian Ingredients

Some of these ingredients are hard to find in a typical grocery store.

I've also included some other Chinese kitchen essentials, used in many of my dad's recipes.

These links are affiliate links, which means that if you use our links to purchase these ingredients, Amazon pays my family a small amount for the sale - at no extra cost to you. If you use these links, we really appreciate the support!

We'll need to wash the baby bok choy (1 lb) thoroughly:

  • Peel away each individual stem, and toss them into a bowl of large water
  • Scrub your fingers along the bottom of each stem closest to the root. Dirt usually accumulates here.
  • Rinse under running water.
  • If you have time, my parents like to soak the bok choy in water for 30 minutes.

Drain the bok choy (1 lb) in a colander, and lay them flat onto a towel. It's important that we dry them before stir-frying.

We'll be trimming the bok choy by cutting the stems in half length-wise.

We can also optionally separate the leaves from the stalk. Sometimes my dad prefers to cook the stalks first, and then the leaves.

Heat the wok on high heat for 2-3 minutes.

While the wok heats up, we'll mince some garlic (2 clove).

Then, add corn oil (2 tbsp) until the oil is shimmering, or forming ripples across the surface.

It's important that the wok and oil get sufficiently hot.

Add the minced garlic, and then the bok choy stalks a few seconds later. Then, add the rest of the bok choy.

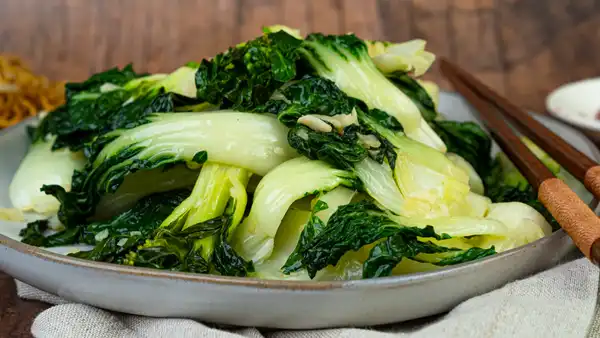
We'll be cooking everything for 6-8 minutes. We're looking for the stalks to soften a bit and the leaves to turn a more deep, vibrant green.

Right before we finish cooking, we'll add our salt (0.50 tsp), sugar (0.50 tsp), and chicken bouillon (0.50 tsp) (optional).

Especially for the salt and chicken bouillon, it's important to add this at the very end before plating, since they'll instantly start causing the bok choy to release moisture.

To stop the bok choy from overcooking, we'll want to transfer them onto a plate immediately.

FAQ

What's the difference between baby bok choy and bok choy?

  • You might see a few different selections of bok choy at the store, with different variations on the name. Sometimes different stores even have different names for the same kind.
  • There are two most common types of bok choy, and each of those are often sold at two different maturity levels.
  • For Cantonese cooking, and for this dish (and our Bok Choy Soup recipe), we use bok choy that has bright white stalks and dark leaves. If there is a Chinese label, expect to see it written as "白菜".
  • These come in smaller, younger plants that are harvested earlier, as well as larger, older plants that have been given more time to grow. The smaller, younger plants are more tender, but tend to be more expensive.
  • The other common type is Shanghai bok choy, or baby bok choy. (Cue the confusion, because sometimes the younger version of the above bok choy is also called baby bok choy...) This one has light green stalks, and the leaves are bright green and not very dark. Shanghai bok choy is more tender and cooks up a little faster.
  • In Chinese, you'll see the label written as 青江菜 or 上海白菜. Sometimes, you'll see smaller versions that have been harvested young. Young Shanghai bok choy is sometimes labeled 白菜苗.

How do you choose bok choy at the store?

  • For this recipe, we're using bok choy with the bright white stalks and dark green leaves. Sometimes they're sold in prepacked bags, and sometimes you can pick them out of a bulk bin.
  • The best bok choy will have fresh-looking stalks and minimal blemishes and brown spots. It'll be compact and firm. Don't choose bok choy that looks wilted, bruised, or has yellowing leaves.

How do you store bok choy?

  • My parents have a fantastic trick for making the most out of a big bok choy haul!
  • First, tear off the outer, older layers of each bok choy and eat those as soon as possible, ideally the day they come home. Since these leaves are older, they're a little tougher, and really ideal for making Bok Choy Soup.
  • Then, the inner pieces of bok choy should go into a plastic bag (if you bought them in a plastic bag, that'll work great). Poke a few small holes in it, and throw in a paper towel to absorb excess moisture.
  • My parents can keep their bok choy for a week this way, although your results will depend on your climate.
  • Make sure you don't wash the bok choy that you're planning to store! Wash them when you are about to cook them.

How do you clean bok choy?

  • Like other plants that grow close to the ground, bok choy can contain a lot of dirt and debris, so it's important to wash it thoroughly!
  • Prepare a big basin of clean water. Pick off the larger outer leaves one by one, breaking them by hand near the stem. Drop the leaves into the water.
  • After the first layer or so of outer leaves, use a small knife to carefully trim off the bottom stem that's been exposed, and discard it. Then, if there are still large leaves, you can break off a few more.
  • When you're done picking the leaves off, if you have time, soak them for 10-20 minutes. It'll make the next step of rinsing a little easier.
  • Rinse the bok choy by holding them under the water and rubbing the stalk with your fingers to scrub off the dirt. Pay attention to the bottom of the stalk where dirt collects the most.
  • Pour out the dirty water and rinse again in clean water, agitating the leaves and shaking them around in the water to get any extra debris off. Then, use a colander to drain the water.
  • Now you have clean bok choy, ready to cook!

How do you cut bok choy?

  • We first break off the outer leaves by hand, but if you'd rather not, you can cut off the biggest leaves where they connect to the stem.
  • Then, you can cut them down more, or slice them in half, or even separate the stalks and the leaves. This will also help you control the cooking time, as the stalks take a little longer to cook and can go into the pan earlier.
  • The inner part that's left, with a lot of stalk and some small leaves, you can slice in half to open them up to cook better.
  • If you have small, younger bok choy, you can slice them in half or thirds, so that it's opened up to cook better, and so that you can make sure there's no dirt hiding inside.
  • In the video, my dad holds them up in the air and just cuts through with a paring knife, but if you're not as comfortable with your knife skills, it's safer to use a cutting board.

How long do you cook bok choy for?

  • Although our recipes indicates 6-8 minutes of cooking the bok choy, of course it depends on your heat, your cooking vessel, and the size of your bok choy!
  • It's best to look for the signs that the bok choy is done, which is that the stalks have softened to your liking (take them out faster if you like them crunchier, and let them keep going if you like them softer) and the leaves have turned a more deep, vibrant green.

Summary

Stir Fried Bok Choy (蒜蓉炒白菜)
A delicious vegetable side dish that's easy, quick, and healthy!
  • Prep Time: 5 min
  • Total Time: 20 min
  • Yield: 4 servings

Stir Fried Bok Choy

  • 1 lb baby bok choy (

    larger bok choy works too

    )
  • 2 clove garlic
  • 2 tbsp corn oil
  • 0.50 tsp salt
  • 0.50 tsp sugar
  • 0.50 tsp chicken bouillon (

    optional

    )

Step 1 - Wash bok choy

↑ Jump to details

Wash the baby bok choy (1 lb) thoroughly.

Step 2 - Dry and trim bok choy

↑ Jump to details

Drain the bok choy (1 lb) in a colander, and lay them flat to dry on a towel.

Trim the bok choy by cutting the stems in half length-wise.

We can also optionally separate the leaves from the stalk. Sometimes my dad prefers to cook the stalks first, and then the leaves.

Step 3 - Mince garlic, heat wok & oil

↑ Jump to details

Heat the wok on high heat for 2-3 minutes.

While the wok heats up, we'll mince some garlic (2 clove).

Then, add corn oil (2 tbsp) until the oil is shimmering.

Step 4 - Cook garlic, bok choy

↑ Jump to details

Add the minced garlic, and then the bok choy stalks a few seconds later. Then, add the rest of the bok choy.

We'll be cooking everything for 6-8 minutes, until the stalks to soften a bit and the leaves turn a more deep, vibrant green.

Step 5 - Add flavors & plate!

↑ Jump to details

Right before we finish cooking, we'll add our salt (0.50 tsp), sugar (0.50 tsp), and chicken bouillon (0.50 tsp) (optional).

Especially for the salt and chicken bouillon, it's important to add this at the very end before plating, since they'll instantly start causing the bok choy to release moisture.

To stop the bok choy from overcooking, we'll want to transfer them onto a plate immediately.

Step 6 - Take pictures
Whip out your camera (1). Begin taking photos (1,000,000). Pick your favorites!
Step 7 - Share and tag us on Instagram @madewithlau #madewithlau!
Did you have fun making this recipe? We'd love to see & hear about it. (Especially my dad. He would be THRILLED!)

Enjoy!

My sister and I have many, many happy memories of enjoying this dish growing up.

Now, hopefully, you can create your own memories with this dish with your loved ones.

Also, I cordially invite you to eat with us and learn more about the dish, Chinese culture, and my family.

Cheers, and thanks for cooking with us!

Feel free to comment below if you have any questions about the recipe.