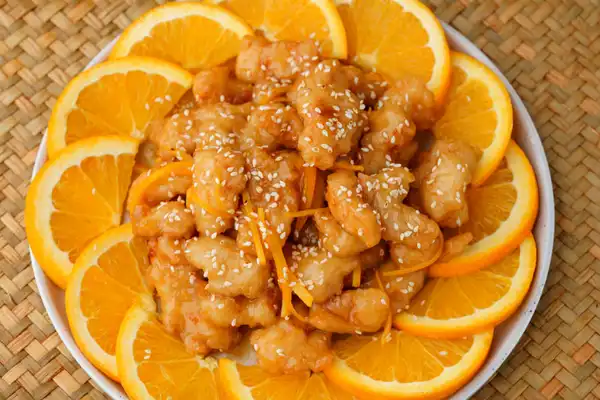
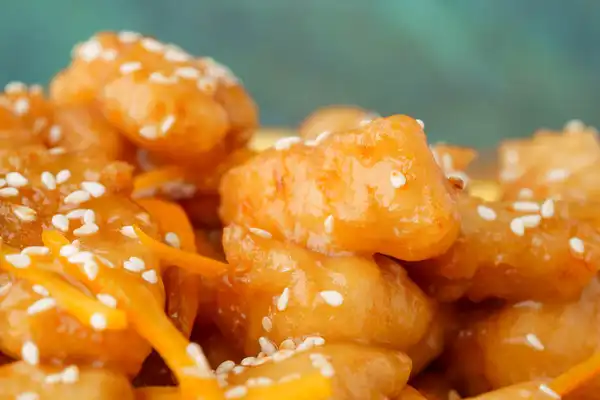
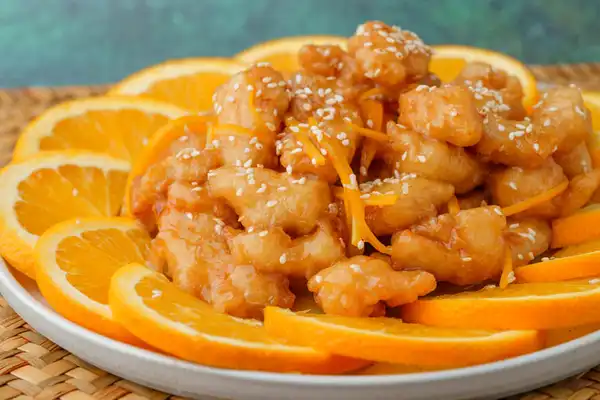
Orange Chicken (鮮橙雞柳)

Get the perfect sweet-and-sour crunch with this signature Chinese American chicken dish!

flodesk gif
Prep Time
15 min
Total Time
45 min
Yields
4 servings

A Recipe by Daddy Lau

My dad's been cooking Chinese food for over 50 years - as a kid fending for himself in Guangzhou, as the head chef of his own restaurant, and as a loving father in our home.

Hopefully, by learning this recipe, you'll get to experience some of the delicious joy we felt growing up eating his food!

- Randy

Where does orange chicken come from?

We can thank Panda Express Executive Chef, Andy Kao, for inventing this amazing dish in 1987 in Hawaii.

He drew inspiration from the Hunan province of China, a region whose food is known for bold flavors and bright colors. Now, his sweet-and-sour creation is a signature item on countless Chinese American menus.

What can you eat with orange chicken?

Steam up some fluffy rice and make some other take-out classics like Hot & Sour Soup or Egg Drop Soup, Honey Walnut Shrimp and Beef & Broccoli. If you'd rather skip the rice, orange chicken also goes great with Vegetable Lo Mein.

Check out a quick story summary of our recipe!
Ingredients

Weight: US
oz
g
Volume: US
cup
mL
Servings
4

Main Ingredients

  • 12 oz chicken breast
  • 2 large orange (

    for juicing and garnish; can also substitute 5 oz juice with no pulp

    )

Seasoning

  • 1 tsp salt
  • 1 tbsp cornstarch
  • 1 tbsp water
  • 0.50 beaten egg
  • 1.3 tbsp sugar
  • 1 tbsp white vinegar
  • 0.50 tsp salt
  • 1 tbsp oyster sauce
  • 1 tbsp cornstarch
  • 3 tbsp water

Batter

  • 3 tbsp flour
  • 1 tbsp cornstarch
  • 1 tsp baking powder
  • 5 tbsp water
  • 0.25 beaten egg
  • 1 tsp oil

Other

  • 1 lb oil (

    for deep-frying chicken

    )
  • 0.50 tbsp oil (

    to begin stir-frying; can use oil reserved from deep-frying

    )
  • 1 tbsp oil (

    to be added during stir-frying; can use oil reserved from deep-frying

    )
  • 1 tsp oil (

    to finish stir-frying; can use oil reserved from deep-frying

    )
  • 1 pinch sesame seeds (

    optional, for garnish

    )

The perfect batter for frying chicken

Daddy Lau emphasizes a 3:1 flour to cornstarch ratio for our batter, because using only flour wouldn't give us enough crunch, while using only cornstarch would turn out rock-hard. A small amount of baking powder contributes to the delicacy of the crunch.

This batter will give you perfectly crispy chicken pieces that can hold up a loving layer of sticky orange chicken sauce.

Sweetening it up

One of the most defining features of orange chicken is its striking color: bright orange sauce on bright white chicken. That's why our recipe uses white, granulated sugar and chicken breast.

You could definitely use other sweeteners like honey, and other parts of chicken like drumsticks. Just be aware that the final look of the dish turn out different, though it'll still taste delicious!

Oranges and lemons, too

Have you heard of orange chicken's lesser-known cousin, lemon chicken? It's nearly the same recipe, but with lemons instead of oranges, of course.

Since you're already learning to adjust the amounts of sugar and vinegar to suit your taste, try making this recipe with a lemony twist! You'll have to add some more sugar to account for the sourness of the lemons.

Because chicken breast is usually thicker on one end and thinner on the other, take the chicken breast (12 oz) and cut it in half horizontally to even out the thickness. Then cut it into roughly 1/2 inch thick strips.

Put the chicken into a medium-sized bowl and push it to the side, so that you have room to mix together salt (1 tsp), cornstarch (1 tbsp), and water (1 tbsp). Dissolving the dry ingredients into the water first will make the marinade easier to distribute evenly. Then mix it all together.

Then, add and mix in the beaten egg (0.50 ), which will help the batter adhere to the chicken later on.

Slice orange (1 large) into 1/8ths, and then squeeze out the juice into a small bowl. Put the juiced slices aside for later.

If your juice has debris in it, you can strain it.

Add sugar (1.3 tbsp) and white vinegar (1 tbsp). You can adjust the amounts now, or later on, to your liking.

Add salt (0.50 tsp) and oyster sauce (1 tbsp). to enhance the orange sauce.

Mix together cornstarch (1 tbsp) and water (3 tbsp) in a small bowl. When we add this cornstarch slurry to the cooking process later, it will thicken the sauce and make it really cling to the chicken.

For presentation (and a refreshing snack between bites of chicken), we'll cut up the orange (1 large) for garnish. Cut the orange in half, and then into 1/4 inch slices.

We also want to use the peel from the orange slices that we juiced earlier, although this is optional. Turn your knife horizontal and carefully cut off leftover orange flesh and as much of the white pith as you safely can, until you are left with only the orange part of the peel. The pith tastes bitter and can really affect the flavor of your dish.

Then, slice the orange peel into very thin strips. You'll probably only want to use about half of it, because too much of the peel will make the dish taste bitter. Again, it's optional to use the peel at all.

Mix together flour (3 tbsp), cornstarch (1 tbsp), and baking powder (1 tsp). Then, mix in water (5 tbsp). You may need to add more water to get the correct consistency, but you can wait to see what it looks like after adding the other liquid ingredients.

Pour in beaten egg (0.25 ) and oil (1 tsp), and mix until thoroughly combined. The resulting batter should resemble pancake batter, giving some minor resistance when you stir it, with thin ribbons that fall and melt quickly into the batter. It'll be smooth and just thick enough so that it can coat the chicken well and become a crispy crust.

Turn up your fan, because we're going to deep-fry this chicken! In a deep pot, pour in enough oil (1 lb) so that the chicken will be submerged completely. Heat up the oil to 300°F.

While the oil heats up, mix the batter in with the chicken. Then, they're ready for the first fry.

Carefully place individual pieces of chicken into the oil, keeping them separate so they don't stick together. Fry the pieces until they're slightly golden, which takes about 2.5-3 minutes, and then scoop them carefully out of the pot and into a bowl or dish.

We recommend doing this initial fry in two or more batches, because it'll be easier to keep them from sticking together, and because bigger batches of chicken will make the temperature of the oil fall more rapidly, which may result in greasier, soggier chicken.

When all of the chicken has gone through the first fry, heat up the oil to 400°F. This is the fry that gets us the much-coveted crunch. Put all of the chicken back in (if it fits, there's no need to split this into batches), and fry for another 2.5-3 minutes, until they're golden brown.

Take the chicken out, and also reserve the oil for cooking with later. We'll use some of it in the next step.

We're going to cook the sauce first, and then toss in the fried chicken.

Turn the stove on high, and add oil (0.50 tbsp) to the wok. You can use the oil that you reserved from frying the chicken in the previous step. Add the thinly sliced orange peel and give it a quick stir.

Then, pour in the orange sauce. Let it come to a boil.

Meanwhile, begin garnishing the serving dish by arranging the orange slices in a tidy pattern around the outside edge of the plate.

Once the sauce has come to a boil, lower the heat and slowly drizzle in the cornstarch slurry. Be sure to stir constantly so that you don't end up with a big lump of cornstarch in your wok. Add more oil (1 tbsp).

If you want to cook off more of the water for a thicker sauce, keep the sauce cooking for a bit longer before adding the chicken.

When you're ready to add the chicken, turn the heat back up and add the chicken pieces back in. Toss the chicken around in the sauce for 15-20 seconds, and then turn off the heat. Drizzle oil (1 tsp) for added shine, mix quickly, and plate.

Arrange the sauced-up chicken onto the plate with your neatly-arranged orange slices, and if you have sesame seeds (1 pinch), sprinkle them on top.

FAQ

How do you keep the chicken crispy?

  • The most important thing for getting orange chicken crispy in the first place is the double fry method. We fry it once at a lower temperature to cook it through, and then once more at a higher temperature to get the moisture out of the coating.
  • But as soon as you mix the chicken into the sauce, that crust is going to start soaking in the liquid of the sauce, so it's best to dig in as soon as it's done cooking!
  • Mommy Lau also suggests trying an air-fryer to reheat the orange chicken. It won't be as good as a fresh batch of orange chicken, but it may help regain some of the crunch.

What is in the orange chicken sauce?

  • The primary flavors of the orange chicken sauce come from orange juice and vinegar. Sugar balances out the tartness of the orange juice, and salt and oyster sauce boost the complexity.

Can you make the sauce thicker?

  • You can easily control the viscosity of the sauce! If you like it thinner, then follow our recipe as is, letting the sauce just come to a boil, and then adding the cornstarch slurry. If you prefer a thicker, stickier sauce, then keep the sauce boiling for longer to let more water cook off.

How do you get the right sweetness in the orange sauce?

  • You can adjust the amount of sugar and vinegar according to how sweet and how tart your oranges are, and also according to your own preference. Feel free to sneak a taste as you mix and cook the sauce. Just don't burn your tongue if it's hot!
  • If it tastes bitter, it may be because you're adding too much sliced orange peel, or because your orange peel isn't clean of the white pith. Try using less, and make sure that you cut away all traces of the bitter white pith.

Summary

Orange Chicken (鮮橙雞柳)
Get the perfect sweet-and-sour crunch with this signature Chinese American chicken dish!
  • Prep Time: 15 min
  • Total Time: 45 min
  • Yield: 4 servings

Main Ingredients

  • 12 oz chicken breast
  • 2 large orange (

    for juicing and garnish; can also substitute 5 oz juice with no pulp

    )

Seasoning

  • 1 tsp salt
  • 1 tbsp cornstarch
  • 1 tbsp water
  • 0.50 beaten egg
  • 1.3 tbsp sugar
  • 1 tbsp white vinegar
  • 0.50 tsp salt
  • 1 tbsp oyster sauce
  • 1 tbsp cornstarch
  • 3 tbsp water

Batter

  • 3 tbsp flour
  • 1 tbsp cornstarch
  • 1 tsp baking powder
  • 5 tbsp water
  • 0.25 beaten egg
  • 1 tsp oil

Other

  • 1 lb oil (

    for deep-frying chicken

    )
  • 0.50 tbsp oil (

    to begin stir-frying; can use oil reserved from deep-frying

    )
  • 1 tbsp oil (

    to be added during stir-frying; can use oil reserved from deep-frying

    )
  • 1 tsp oil (

    to finish stir-frying; can use oil reserved from deep-frying

    )
  • 1 pinch sesame seeds (

    optional, for garnish

    )

Step 1 - Prepare chicken

↑ Jump to details

Cut the chicken breast (12 oz) in half horizontally to even out the thickness. Then cut it into roughly 1/2 inch thick strips.

Season the strips with salt (1 tsp), cornstarch (1 tbsp), and water (1 tbsp). Then, add and mix in the beaten egg (0.50 ).

Step 2 - Prepare orange sauce

↑ Jump to details

Slice orange (1 large) into 1/8ths, and then squeeze out the juice into a small bowl. Put the juiced slices aside for later.

Add sugar (1.3 tbsp) and white vinegar (1 tbsp). You can adjust the amounts now, or later on, to your liking.

Add salt (0.50 tsp) and oyster sauce (1 tbsp).

Step 3 - Create slurry

↑ Jump to details

Mix together cornstarch (1 tbsp) and water (3 tbsp) in a small bowl.

Step 4 - Prepare orange slices & peel

↑ Jump to details

Cut up the orange (1 large) for garnish. Cut the orange in half, and then into 1/4 inch slices.

(Optional) Prepare the juiced orange slices by cutting away the orange flesh and white pith until you are left only the orange part of the peel. Then, slice the orange peel into very thin strips.

Step 5 - Prepare frying batter

↑ Jump to details

Mix together flour (3 tbsp), cornstarch (1 tbsp), and baking powder (1 tsp). Then, mix in water (5 tbsp). You can add more water to adjust for the consistency of the batter.

Pour in beaten egg (0.25 ) and oil (1 tsp), and mix until thoroughly combined. The consistency of the batter should resemble pancake batter.

Step 6 - Deep-fry chicken

↑ Jump to details

In a deep pot, pour in enough oil (1 lb) so that the chicken will be submerged completely. Heat up the oil to 300°F.

While the oil heats up, mix the batter in with the chicken. Then, they're ready for the first fry.

Fry the chicken pieces until they're slightly golden, which takes about 2.5-3 minutes, and then scoop them carefully out of the pot and into a bowl or dish.

We recommend doing this initial fry in two or more batches.

When all of the chicken has gone through the first fry, heat up the oil to 400°F. Put all of the chicken back in (there's no need to split this into batches), and fry for another 2.5-3 minutes, until they're golden brown.

Take the chicken out, and also reserve the oil for cooking with later. We'll use some of it in the next step.

Step 7 - Stir-fry everything together

↑ Jump to details

With the stove on high, add oil (0.50 tbsp) to the wok. Add the thinly sliced orange peel and give it a quick stir.

Then, pour in the orange sauce. While it comes to a boil, arrange the orange slices on the serving plate.

Once the sauce has come to a boil, lower the heat and slowly drizzle in the cornstarch slurry. Add more oil (1 tbsp).

If you want to cook off more of the water for a thicker sauce, keep the sauce cooking for a bit longer before adding the chicken.

When you're ready to add the chicken, turn the heat back up and add the chicken pieces back in. Toss the chicken around in the sauce for 15-20 seconds, and then turn off the heat. Drizzle oil (1 tsp) for added shine, mix quickly, and plate.

Step 8 - Plate

↑ Jump to details

Arrange the sauced-up chicken onto the plate with your neatly-arranged orange slices, and if you have sesame seeds (1 pinch), sprinkle them on top.

Step 9 - Take pictures
Whip out your camera (1). Begin taking photos (1,000,000). Pick your favorites!
Step 10 - Share and tag us on Instagram @madewithlau #madewithlau!
Did you have fun making this recipe? We'd love to see & hear about it. (Especially my dad. He would be THRILLED!)

Enjoy!

We have many, many happy memories of enjoying this dish growing up.

Now, hopefully, you can create your own memories with this dish with your loved ones.

Also, I cordially invite you to eat with us and learn more about the dish, Chinese culture, and my family.

Cheers, and thanks for cooking with us!

Feel free to comment below if you have any questions about the recipe.